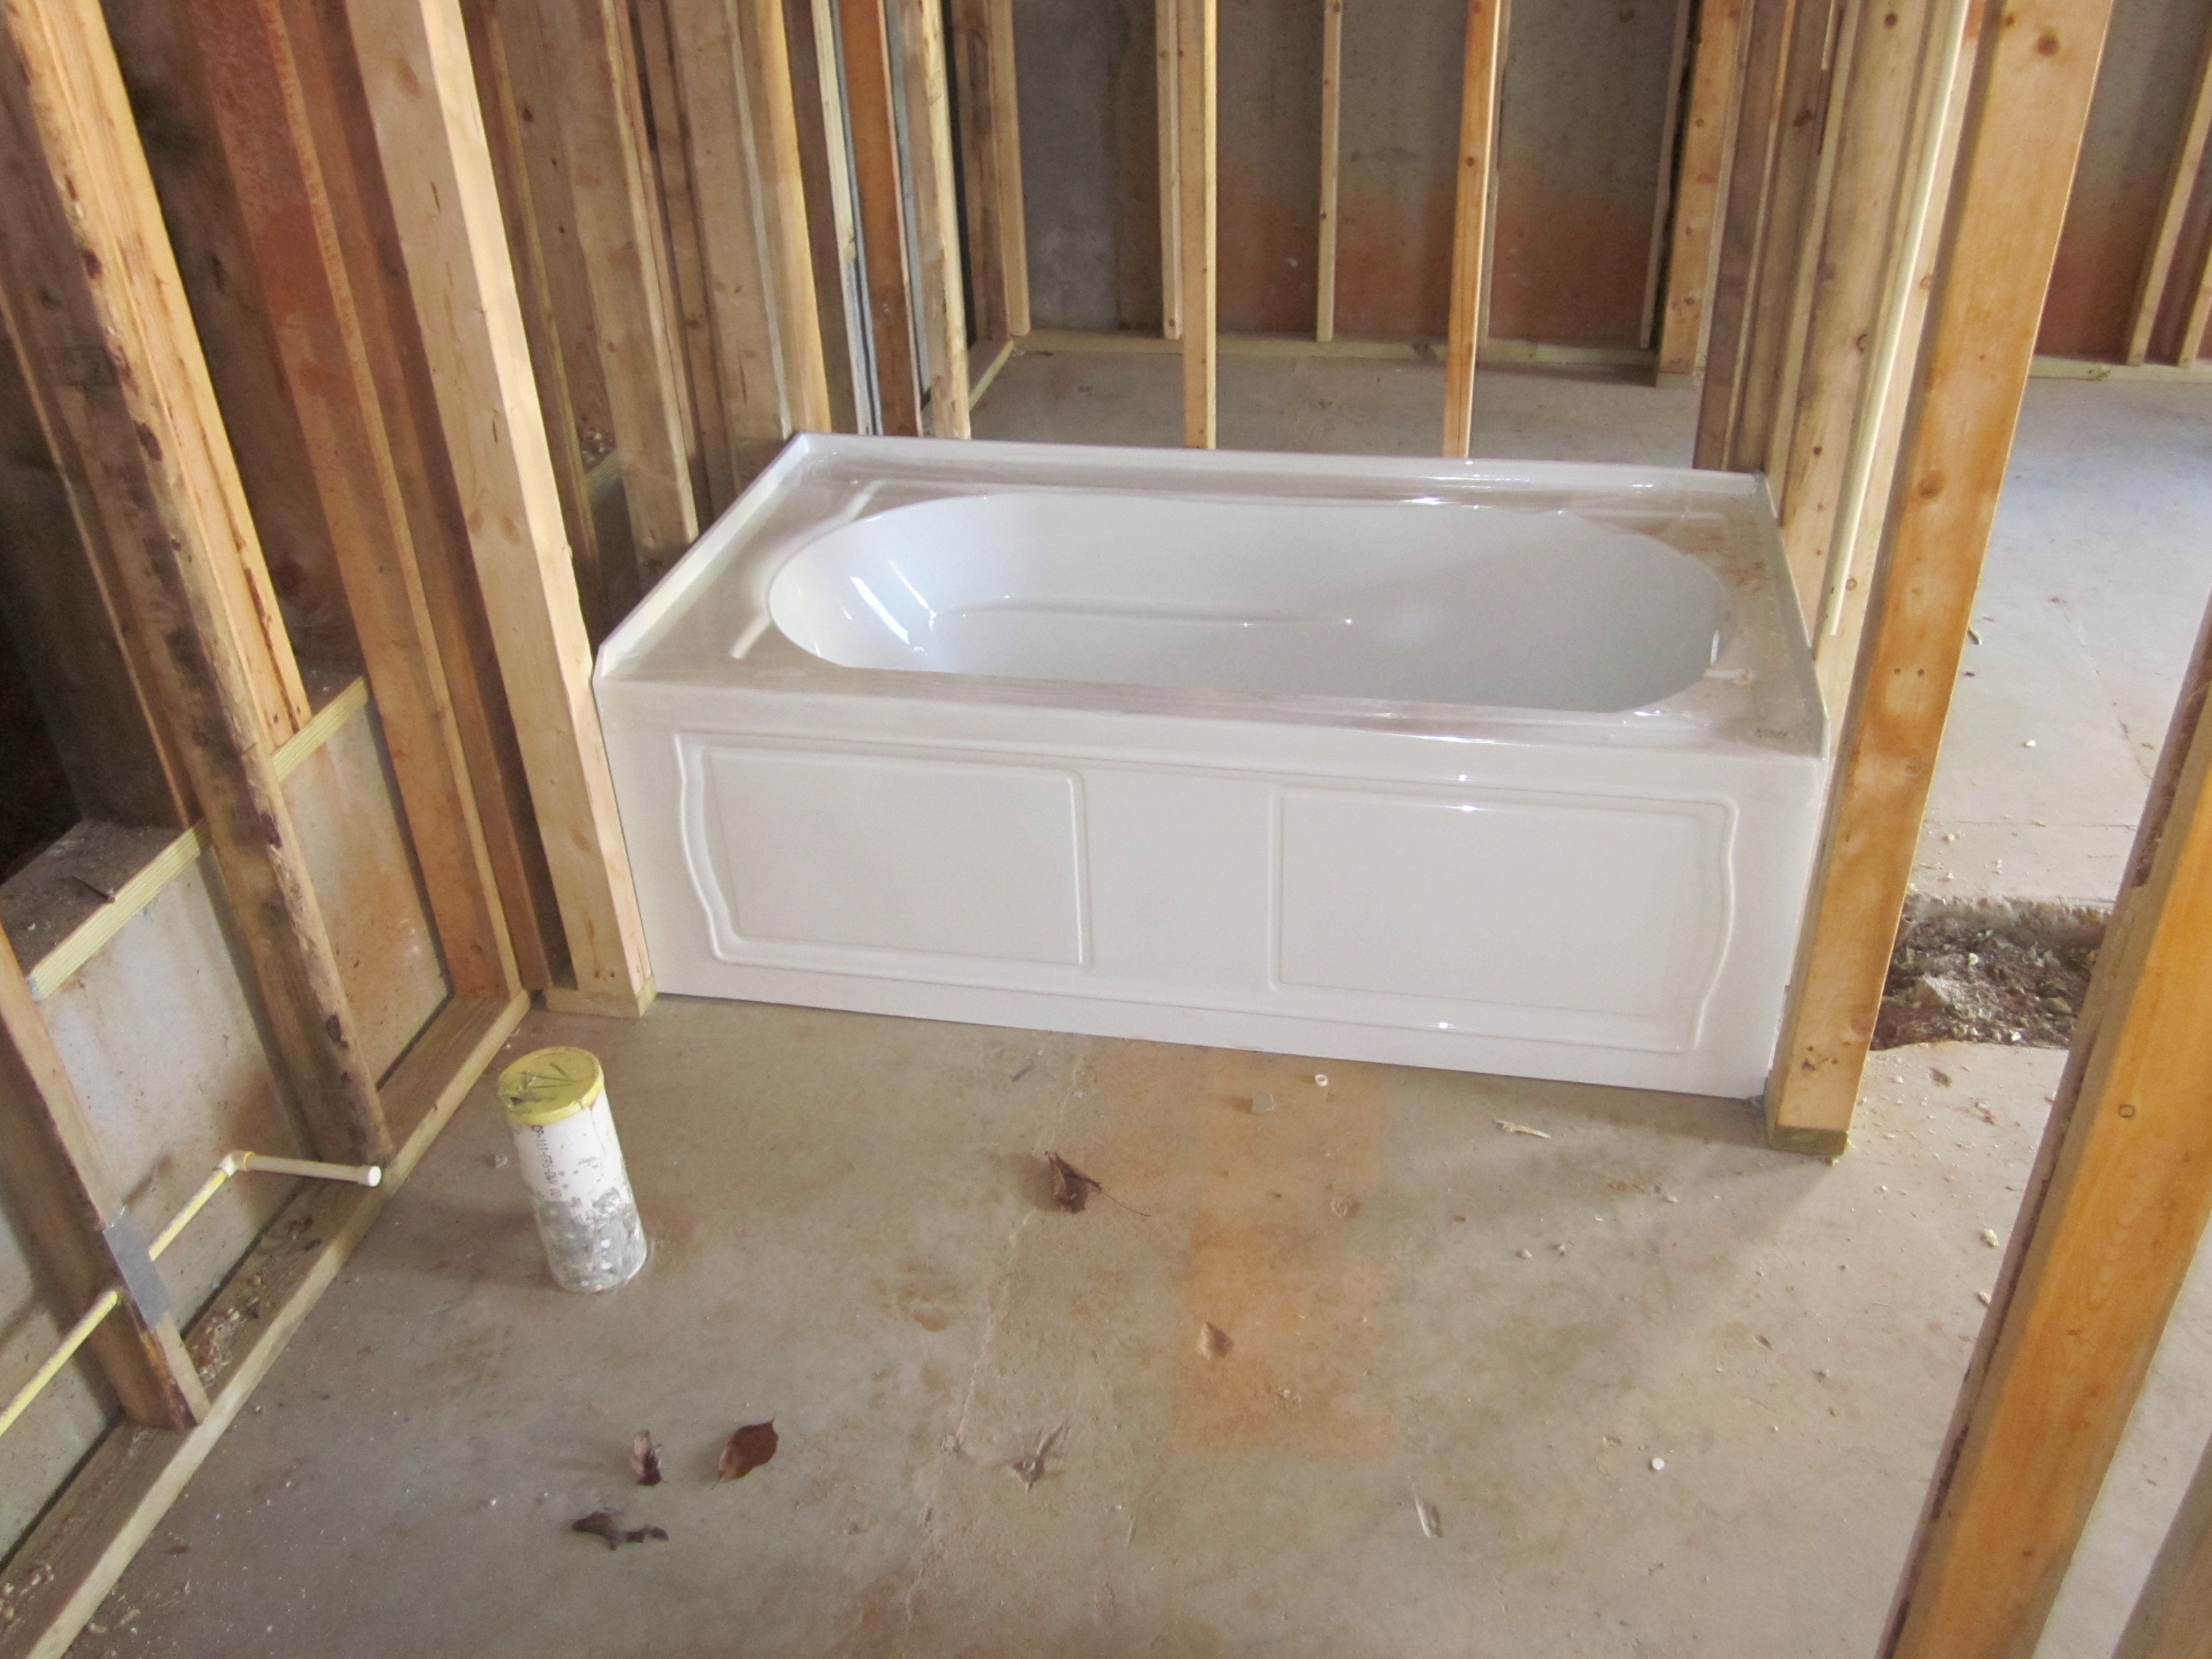
Just thought that I would give a quick update on what progress has happened at our house during the last several weeks. As you can imagine the holidays basically brought everything to a halt and if it wasn’t the holidays it’s been the rain. However the rough plumbing was recently completed and just last week our GC finished installing the tubs.
We were originally going with a standard tub in all of the bathrooms, except the master, however our GC, amazing guy, was able to secure these awesome KohlerDevonshire tubs which have a 20″ depth and gave them to us for the same price as the standard ones. This guy is incredible.
The hole(missing concrete) in the above picture was where our former GC originally put the plumbing…in a bedroom…bright guy huh?
And for the Master Bath (below) we decided not to go with one that was jetted, so we chose a 41 1/2″ x 70″ Bathcraft tub manufactured by Craftsmen, model A97040-00.
It’s funny, it will be a while before the house is ready and we’re able to actually utilize the tubs but it’s still pretty exciting having them installed. Plus, it’s the first time I’ve seen the boys excited about taking a bath – we’ll see how long that lasts.
The holidays are behind us and even though we have rain forecasted throughout the end of this week I’m hoping for good weather in the near future…we still have a long way to go.
So our GC asked me the other day if I had any further thoughts regarding the type of insulation for our house. Originally we were planning on having Spray Foam Insulation however this was unfortunately one of the sacrifices that had to be made and replaced with a much cheaper solution when we decided to move forward with our project. It pains me as it seems as if all of the more energy-efficient, “green”, selections are getting replaced by more traditional and initially cost-effective options.
However due to Mike Holmes as well as numerous articles I’ve basically fallen in love with spray foam and all of its attributes and it’s hard for me to let go. I realize that the winters in Atlanta aren’t near as brutal as those to the north however I still find myself trying to justify the added expense or better yet, trying to find areas where we can reduce other costs. Yes, I’m starting to believe that I’ve had a taste of the Kool-Aid or at least smelled it and now I want some.
So far we’ve done a decent job at trimming our expenses, however this was a forced necessity and now I find myself acting like our government. We need to trim more of the expenses to be able to complete our task however now I want to spend that “savings” and further increase our overall cost of the project. Well I’m not completely like our government – at least I’m not going to our neighbors and mandating that they pay for these additional expenses to subsidize out project.
Now if you’ve read any of my prior posts you know that I can be a little hard-headed or stubborn, however the inside of our house is completely exposed, down to the studs, and if we’re going to do it – now is the time.
A brief and elementary rundown of what I’ve learned after a little “research”
Spray Foam Insulation – there are two types: open and closed cell. Open Cell seems to be less dense and doesn’t insulate as well where Closed Cell is a better insulator however it is more expensive than Open Cell
Blown–Cellulose Insulation – Cheaper alternative of the three, can be done as a DIY project. Make up of product is generally material which has been recycled.
Rolled- Fiberglass Insulation – Commonly thought of as the Pink Stuff, has traditionally been known as a high-quality insulator.
Disclaimers
Since our GC is contracting this out, I’m not going to focus on the ease of installation from a DIYr’s perspective, although I’ve read that spray foam is best left to the professionals as it’s more challenging to install when compared to the others.
I have only considered research conducted within the Atlanta area and it’s possible the results can differ by region.
Yes, I read about the various environmental concerns of spray foam insulation, however after reading numerous reports and articles I have decided not to address or take into account due to the simple fact that I find both sides highly debatable.
By no means is the following chart entirely accurate as I purposely neglected to weight the individual categories
Now that all of the disclaimers are out-of-the-way it is probably best to know that I’ve rated the following with 3 being the best and 1 being the least desirable.
So there you have it, of course the more expensive option is more superior, but is it worth it? I’ve heard the arguments about the return on your investment through savings achieved by a reduction in energy costs but I still wonder if that is really the case and there’s a big difference in that return being within 3 years versus 7, 10 or 15 years. I’ve also looked into various rebates offered by state and local governments as well as one of our utility providers however those still do little to offset the initial costs associated with Spray Foam being that it’s almost double the expense.
Is Spray Foam superior to the others? My thinking is yes, without a question. While there is no such thing as a perfect product it seems through research that it is a better insulator than the other two options. That’s not to say that Cellulose or Fiberglass Insulation don’t perform well or have their own positive attributes but by comparison from research and word of mouth they don’t seem to match Spray Foam.
So what does that mean for our project? As I mentioned earlier we’re unfortunately having to eliminate a great deal of the “energy-efficient” options from our project. It’s disappointing but my Velux Sun Tunnels are looking as if they will remain on the elimination list. This decision wasn’t easily made and it wasn’t due to the quality of the product, however we’ve been forced to trim our budget and it was hard to justify the added expense. So does Spray Foam remain in its seat alongside the Sun Tunnels? Not sure just yet. I’m infatuated, possibly in love, with it, however I’m trying to prepare myself that it might just be that we have to settle for the pretty pink stuff just because of the added expense.
Would love to hear your experiences with the three options.
It probably goes without saying but I never knew the true value of it until our ordeal. Take pictures if you’re in the process of or about to begin a renovation/building/remodeling project – lots of them. Pictures can be extremely helpful if there is ever a dispute about the quality of work that was performed. I imagine most people generally take a few “before and after” pictures as well as when their project reaches certain milestones. However I would strongly recommend taking pictures more frequently, possibly everyday if there is a lot of work being done – and make sure that you take them covering all aspects and phases of the project.
These pictures can potentially save you thousands of dollars in the future by showing proof of inferior workmanship. Unlike our first experience, and quite fortunately, the vast majority of General Contractors are admirable, trustworthy and competent professionals, but they’re humans. Everyone makes mistakes and some of these mistakes could end up costing YOU a tremendous amount of money in the future, especially if it’s critical to the structural integrity of your home. Also, it would be great if we could all depend upon our local municipality’s building inspector to catch these mistakes but that doesn’t always happen and in most areas they’re indemnified and can’t be held financially liable. All of the more reason to do everything you can to protect yourself.
Of course you want to be mindful of those working on your project and not get in their way. And you don’t want to be viewed as a homeowner that is just trying to find a mistake and looking to build a case – sure fire way to destroy a contractor/homeowner relationship. At the beginning of your project start with an open and trusting mind while giving the professionals you hired the benefit of the doubt since they do this a lot more frequently than most of us – we hope. These pictures should just be viewed as insurance, same as we have for our cars and house.
Now, if you do find a mistake make sure you take detailed pictures of it along with the surrounding area. Keep in mind that if these pictures are ever presented to a third-party in order to make a judgment you want there to be undeniable proof of your claim– remember that the burden of proof is always on the homeowner.
From the beginning of our project I took a lot of pictures out of pure excitement, not even thinking that I might need them one day. Every day I would stop by the house and take pictures of the progress. A few of them I’ve posted on this site and Flickr however that is a small percentage of all of the pictures which I’ve taken. When I started finding mistakes I made sure to take a lot of pictures from all angles and views. For instance, after the initial framing was completed and we discovered that the ceiling height in the basement was going to be at least 6” shorter than what was on the plans I made sure to document this by taking pictures and videos showing the error and I even used a tape measure which gave more accurate proof of our claim.
Keep in mind that any litigation will be an uphill battle for a homeowner. Unfortunately when going before an arbitrator or a judge homeowners are often at a disadvantage and at times prematurely viewed in a negative light before a hearing even begins. The contractor has more knowledge about construction(most of the time), knows the jargon and depending if your contract includes arbitration language with an arbitrator already identified, they could possibly already have a relationship established with those determining the outcome. While not a guarantee of victory, pictures can certainly help to even the playing field and take away some of your contractor’s argument. They say pictures are worth a thousand words and in these instances it couldn’t be truer.
Thankfully most people won’t have a similar situation as we experienced however these pictures can still come in handy years from now by serving as an x-ray of what’s behind all of the sheet rock and finishes. This alone could save you hundreds of dollars. One too many times a contractor has probably said to a homeowner “we have no idea what’s behind those walls until we open it up”, your pictures will eliminate some of the guess/exploratory work and expense.
There it is and pretty simple, take pictures and lots of them – before, during and after your project. If you have a video camera it’s not a bad idea to utilize it as well. Download the pictures and/or video to a disk or external hard drive and keep them someplace safe. Hopefully you’ll never need them but if you do they can prove to be invaluable.
Originally I was planning on having these installed in the Master Bath, our walk-in closets, Kitchen, Boys’ Bathroom, and Laundry Room but since can lighting is less expensive and we’re cutting costs this is one of my “wants” that had to be eliminated. Unfortunately I can’t seem to let it go, meaning that I’m trying to find a way to justify the added expense. Of course I know the argument that “they’ll pay for themselves overtime with reduced electrical use however that just isn’t enough. So basically I’m asking you, “are you familiar with them, have you used them and are they worth the added expense? I’m also concerned about the potential of them leaking. They seem to be an amazing product, adding a lot of natural light and at this point I’m totally sold on them, I just need either more information, a cheaper alternative or to know that they’re not worth the it. Unfortunately I haven’t been able to find very many contractors around the Atlanta area that are familiar with them. Let me know your thoughts if you have any experience or history with them.
So we’re moving along with framing, completed the majority of the interior frame-work, closets, baths, fireplace, stairs, etc…as well as the sheathing on the roof. It is beyond exciting to see it actually all starting to come together.
Not Really – I’m a little behind on posts being that my computer had a nasty virus that basically destroyed my hard drive, but I’m back. During the “down time” I realized how time-consuming it can be to actively blog. Of course I entertained the thought of abandoning it altogether, but that time away was actually good. It allowed me the ability to reflect on why I’m even blogging. As you know a few posts back after reading an article on blogging I wrote about my concern with this site/blog not having a true purpose. This site was originally started as a way to keep our friends and family updated on our renovation/remodeling/expansion project – basically an online journal with updates and pictures. I thought this site would be active for 5 maybe 7 months at most. Life(shit) happens and nothing against professional bloggers but I never expected that 12 months later I would still be typing away.
This “journey” has taken us from our initial excitement – to watch our progress, we’re so excited – to crap I can’t believe this is happening, what do we do – to Ok, we’re committed to this, we have to somehow find a way to pull this off.
Shit happens, we had an incompetent as well as less than honest GC and to now accomplish our original goal (or as close as possible) we’re going to have to do it with an even tighter budget. Unfortunately I don’t have the experience to “Super Man” the job and singlehandedly save us. We’ll have to rely on our new GC to value engineer areas, hopefully I can assist by doing a little DIY work where it’s appropriate, but mostly it will depend upon us making wise economical decisions and choices.
So maybe I’ve found (uncovered) the underlying purpose of this site. From our past misfortunes and during our forward journey my hope is that we’ll be able to share a few areas where we’ve been able to make up ground – create savings. It won’t be easy and there’s quite a gap to bridge but someone once told me to never underestimate determination.
Last, I would love to be able to provide a proven method on how to assure that you won’t get screwed or taken advantage of by an unscrupulous contractor, or at least minimize the risk. However I’ve come to realize that a guaranteed method just doesn’t exist. We read and followed all of the various articles, tips and advice but it still happened. So what do you do if you find yourself in our position? Is it worth pursuing? I’ll try to journal that as well.
Since so much framing progress has been made over the last several days I thought it might be best just to share some of the pictures.
Also & fortunately during framing our GC discovered that the vast majority of the rafters and joists in the original house are still in good condition so it was great to learn that we won’t have to replace those. Also, because of all the water damage to the original hardwood floors due to our former GC not tarping the roof correctly we thought we would have to replace all of the ORIGINAL hardwood floors – fortunately it looks as if we will be able to salvage the ones in the foyer, dining room and one of the bedrooms. My hope is that the transition from the original to the new won’t be too noticeable…
Well even though it may not look like it, a lot of work has been done on our house since my last update. The vast majority of them are structural repairs as it seems that age and carpenter ants had compromised the structural integrity in some places.
As age and gravity can tend to make things sag over time, houses built in the 1920’s aren’t immune to it either. And while some have said that the waves in our hardwood floors add character, I would rather let that come from elsewhere. So they have been supporting the floors by adding new beams below the main floor as well as re-supporting the ones that were already in place.
They’ve also discovered a few places where carpenter ants and Mother Nature had spent some time. Because of this they’ve removed and replaced all of the rotted and eaten wood and re-support the house in those areas as well.
Last, they’ve supported the back of the house, I’m really shocked that the temporary supports held it up for such a long period of time.
So I somehow came across the below article which gives tips on blogging. Not sure how I found it being that 1) I never have nor are my aspirations to make money from this site (humorous even thinking about it), 2) it is a site created and tailored for moms. Nothing against moms, but it’s just not a site that I would normally find myself stumbling upon.
My personal feeling is that everyone has a purpose, that there is a bigger reason than the obvious as to why someone was born. Of course I understand how someone could oppose that statement as I’ve heard some very valid arguments, however I stand firm in my belief. And while I have absolutely no idea as to my own “purpose” I’m determined to eventually uncover that ever elusive question – hopefully.
Anyway, #1 got me thinking. Originally I created this site to update friends and relatives about our construction (remodeling & renovation) project while of course showing numerous pictures of our progress as well as the occasional ones of our boys. Unfortunately that all changed. We experienced a horrible nightmare with our first general contractor and while we came close to abandoning it all we decided to press on and try to accomplish our original task knowing that it will be a huge up hill battle.
So currently and going forward what is the overall purpose of this site? I have no idea. I’ve read my past posts and I’m all over the place. Of course I could continue on the same path but does that really answer the question? One thing I do know, I’ll probably have the answer as to the purpose of this site before I discover my own.


![P_GL_INT_00971_280[1]](https://morningsiderenovation.com/wp-content/uploads/2012/12/p_gl_int_00971_2801.jpg?w=128&h=150)


